
How to Install Industrial Pipe Shelves Like a Pro

Knocking out some home DIY projects lately? 💪
My husband and I love a great home improvement project, and these pretty industrial pipe and wood shelves using plumbing hardware are a fun DIY for anyone. They look stunning, and they’re fairly simple to install, so keep reading to find out how to make your own at home!

I love how these shelves look in our home! 😍
We have absolutely loved how these custom shelves look in our bathroom, and not to mention, they’ve added some much-needed storage to our space. The bulk of the time needed for this project is hanging the piping hardware that acts as a support, and then you set the wood boards on top. Simple enough!
Today, I’m sharing the exact supplies and directions needed to make industrial style shelves like mine!

Here are a couple of tips before starting your DIY:
- Make sure to have your wood pieces cut to size while you’re at the store, and that’ll save you time and effort at home!
- Putting them where it gets humid? We stained ours with Minwax to protect against bathroom humidity and for quick cleanups/dusting.

DIY Industrial Pipe Shelves
PrintSupplies Needed
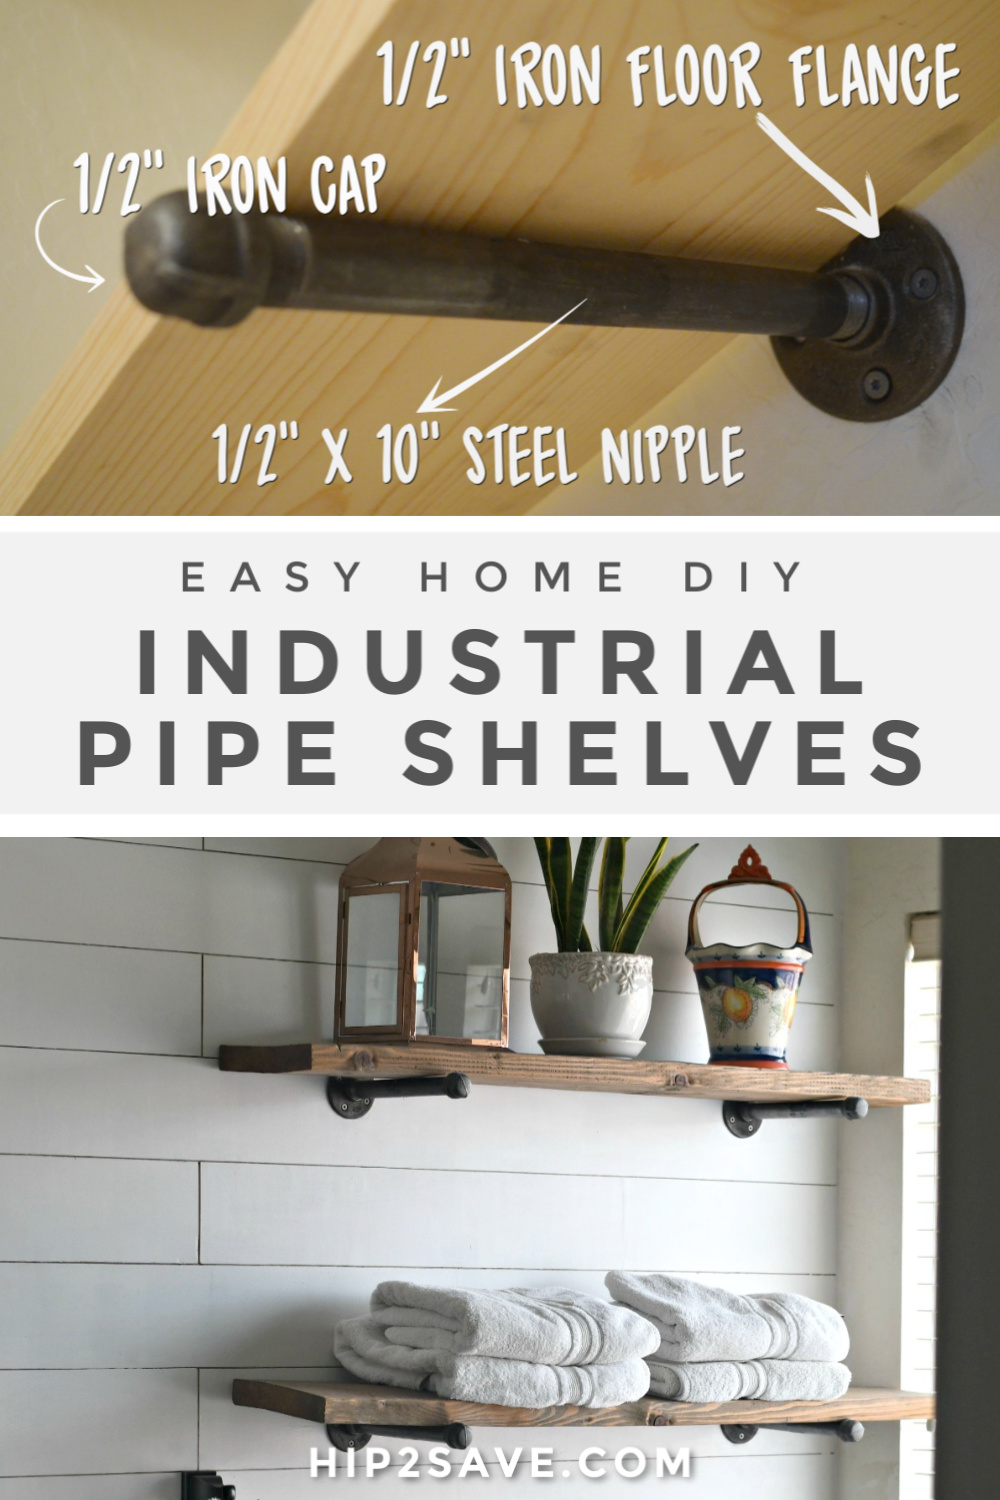
- 1/2″ black iron cap (2 per shelf)
- 1/2″ black iron floor flange (2 per shelf)
- 1/2″ x 10″ black steel nipple (2 per shelf)
- Flat head screws
- 50lbs E-Z Drywall Anchors
- 1″x10″ wood boards (cut to desired size)
- Power drill
- Level tool
Directions
1
While at the hardware store, have your wood boards cut to the desired size. We had 3 shelves cut to 31 inches each.

2
Measure where you would like your shelves and how far apart you want them. We planned on spacing the supports about 8 inches from each end of the wood boards.
3
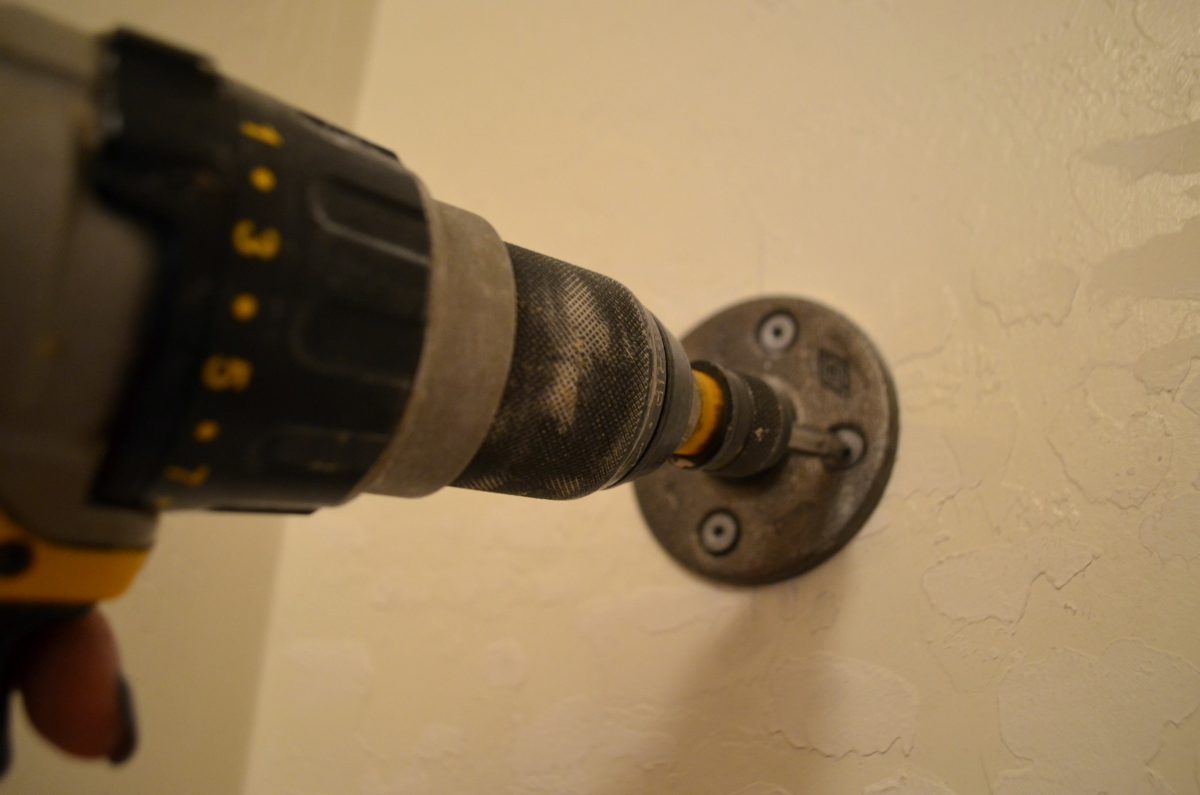
Hold the floor flange up to where you’ll be placing it and make marks with a pencil in each spot where you’ll be drilling a hole.
4
Remove the floor flange and install the drywall anchors at the locations marked. Put the flange back at the marks and fasten screws into place with the drill. Repeat with the other side’s flange, making sure it’s level.
5
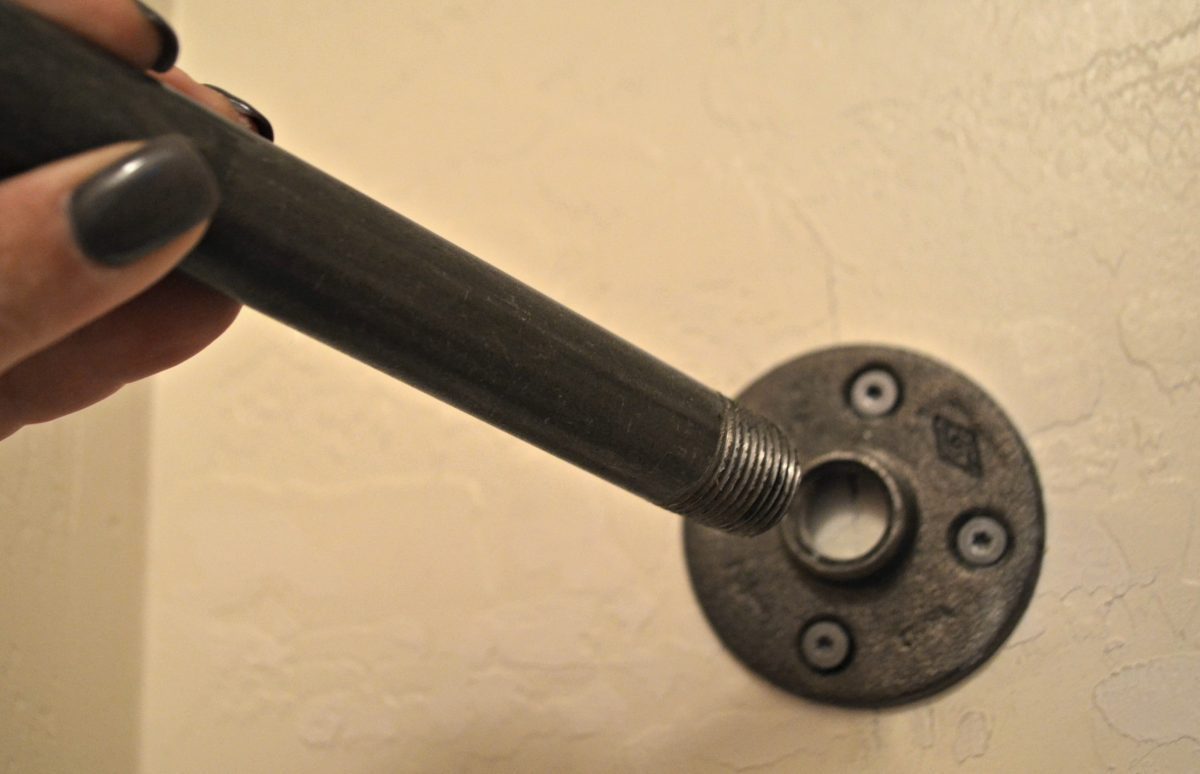
The nipple will then screw into the flange (twist until tight).
6
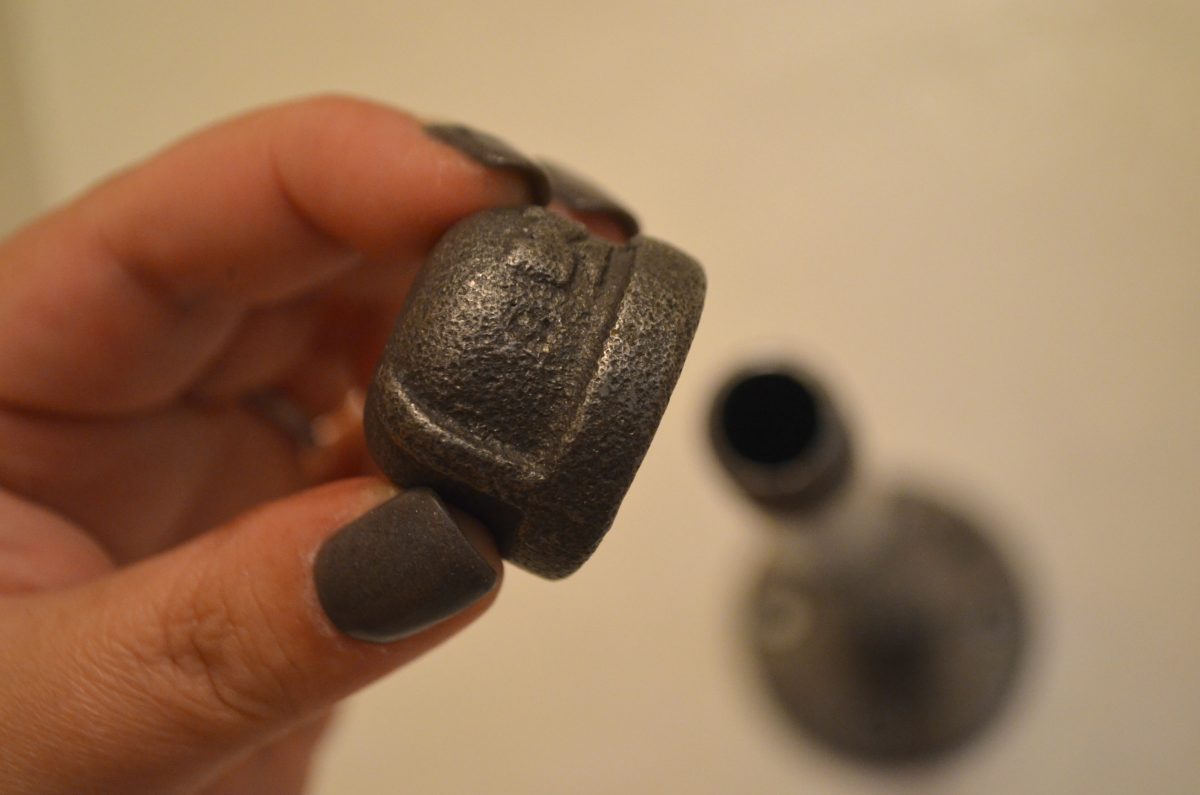
Screw on the cap to the end of the nipple.
7
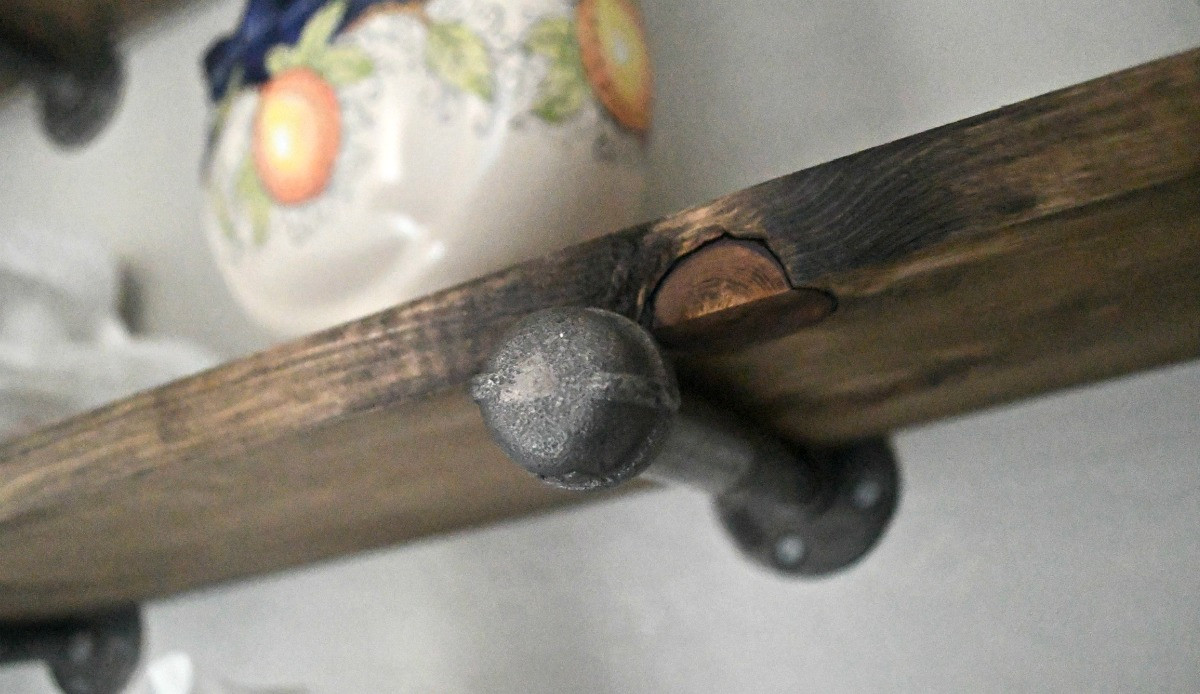
Place your pre-cut shelves on the 2 nipples. The shelf won’t shift forward off of the support because it’s nested between the floor flange and cap. We didn’t use any straps to permanently anchor the shelf into place, but you can if desired.
8
Paint, stain, or leave the wood shelves natural. I stained ours with Minwax stain in Espresso.


These shelves are rustic perfection!
I love that you can stain or leave them with the raw wood look if desired. They can fit in with the popular farmhouse decor look or industrial style.
It’s a project like this that can turn a small bathroom like ours from plain to interesting with just a few hours of work!

We loved this project so much, we did it again!
We installed this shelving to hold towels over our tub. These were installed the exact same way, except built on a bit larger scale, as we used larger 2×12 inch wood boards to build 48-inch shelves using larger 3/4 inch flanges, nipples, and caps. I love how they add so much style and functionality to this space.


Love this shelf style! They look great! Can you share approximate cost for this project? This may be in my future! Thank you!
The hardware is where most of the cost is. Just by adding up the hardware needed from the set of three smaller shelves would be about 60$ plus the wood. Hope that helps!
Thanks for adding your cost estimate. I love this look, and I’m trying to decide whether I want to install some in our bathroom.
$60 not counting the wood seems steep. I see lots of pipe shelf brackets on amazon for way cheaper. I’m not trying to be a jerk, genuinely curious if this is a better route for some reason. 🙂
I’m just sharing the ones we used from Home Depot in-store, but yes of course you can source somewhere else if you’d like 👍
Thanks for your response!
Nothong wrong with saving a little bit of money, but read all the reviews on amazon before placing the order. I just received my order from Amazon for way cheaper, $32 to be exact, but wished now that I had made my own. Although the images on Amazon looked great, the boards are more of a shiny laminate which cheapened the look, not at all the rustic wood I would have preferred. Even a few of the pictures advertised showed a guy cutting boards, goving the illusion that these were cut from real wood. Very deceptive. I Just didnt have the hours to sift through all the reviews to see they were not real. It will have to do. Luckily it’s in my master bathroom, so not many people will see it. Looking forward to doing this tutorial in my main bathroom that everyone uses, so it will look and feel exactly like I wanted it to.
Gorgeous ❤️
I love this look!
Thanks Lori!
If you are building more than a couple shelves or needing the parts for tables legs for example, Amazon has all the same pipe pieces and parts in larger quantities for the same price you would pay in store. We learned this lesson last week. While I’m all for supporting local, sometimes $200+ in cost difference makes you have to look elsewhere.
Another diy I love and would’ve never known I could do on my own! Please, keep these coming! Love it! Thank you!
How do you keep the pipes from rusting from the humidity in the bathroom?
Hi there, I personally wouldnt mind a little bit of a rusty look, but we’ve had these for years now and no issues. I think it may also be due to living in a dry climate too. After a quick google search some ways to avoid rust is to wipe down, sand and keep clean.