DIY Shiplap Tips to Get the Magnolia Home Look Yourself

Does the farmhouse trend have you pining for shiplap walls?
We love the Magnolia Home look of shiplap walls, thanks to the inspiring Joanna Gaines and her beautiful farmhouse look and tips for success! I LOVE the character and texture wood planked walls can add to a space, and I was excited to achieve a similar embellished wall look.
To save you some serious dough (and time) on your own farmhouse look project, I’ve put together a list of tips for getting your shiplap on based on our own project experience!
Shiplap tips for your own Magnolia Home look:
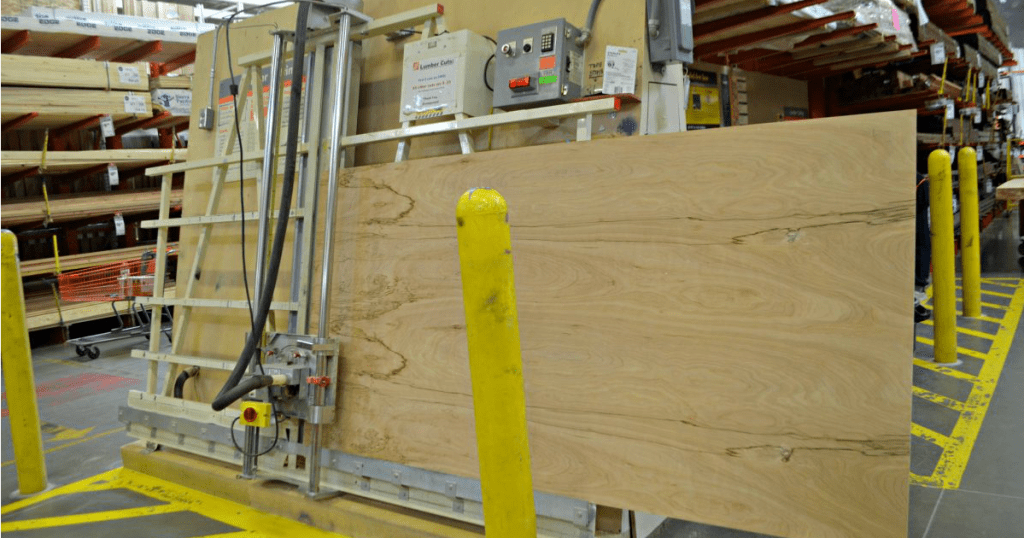
1. Purchase large 4ft. x 8ft. sheets of plywood and cut them down into planks in the sizes you want.
We purchased 1/8-inch thick large sheets of birch plywood that were priced around $10 each. Then I had them cut them down into planks about 6 inches wide at Home Depot. (We cut the lengths ourselves at home using a table saw.) The store charges a nominal fee after a certain number of cuts – about $10 total for them to cut our project.
You can buy the traditional shiplap tongue and groove boards, but those can be pretty pricey and would have equaled a couple hundred dollars per wall in our home. Using our birch plywood tip, we accomplished the look of faux shiplap ourselves for around $50 or less in wood material per wall!
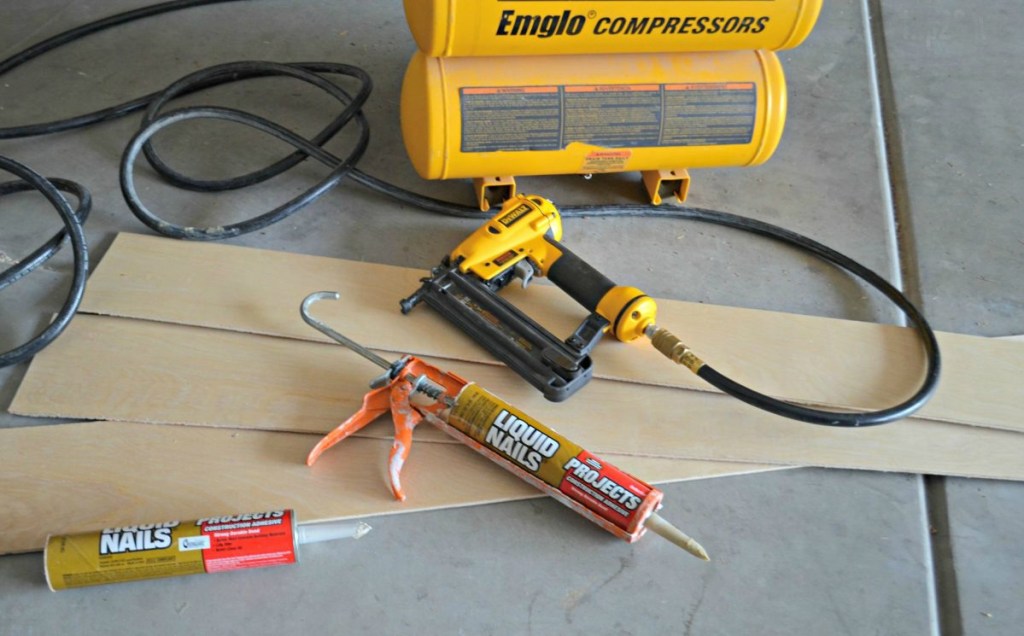
2. Glue and then nail wood to the wall using a nail gun.
Use a construction adhesive, such as Liquid Nails with a caulking gun to first glue wood to the wall, then nail it in place so the glue can set. If you don’t have a nail gun with compressor, consider renting or borrowing one (the project goes so much faster with it).
Hip Tip: It helps to mark out where the studs are in the wall prior to starting so that you can try to hit the studs when nailing. That said, thanks to the added adhesive, it’s not necessary to hit a stud every time. We nailed about every 8-10 inches on every board.
Some prefer to fill each nail hole with wood filler before painting, but we didn’t mind the tiny holes and skipped it. We realize that’s personal preference.
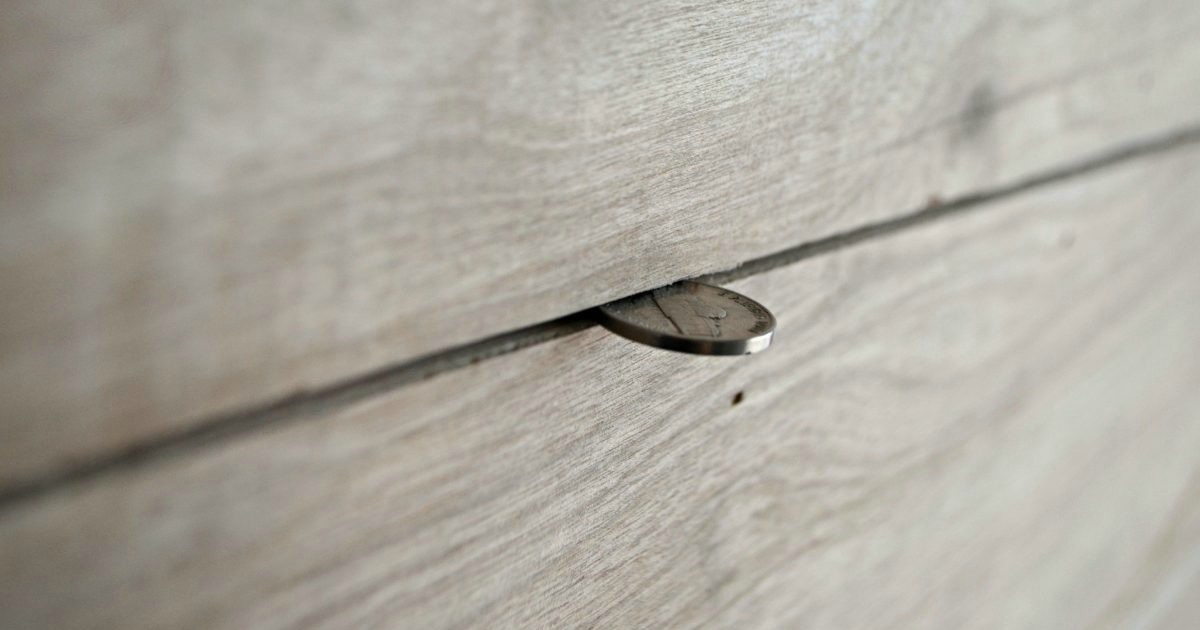
3. Use a coin in between boards for even spacing.
You can buy tile spacers, but we found using a couple nickels per board works well instead!
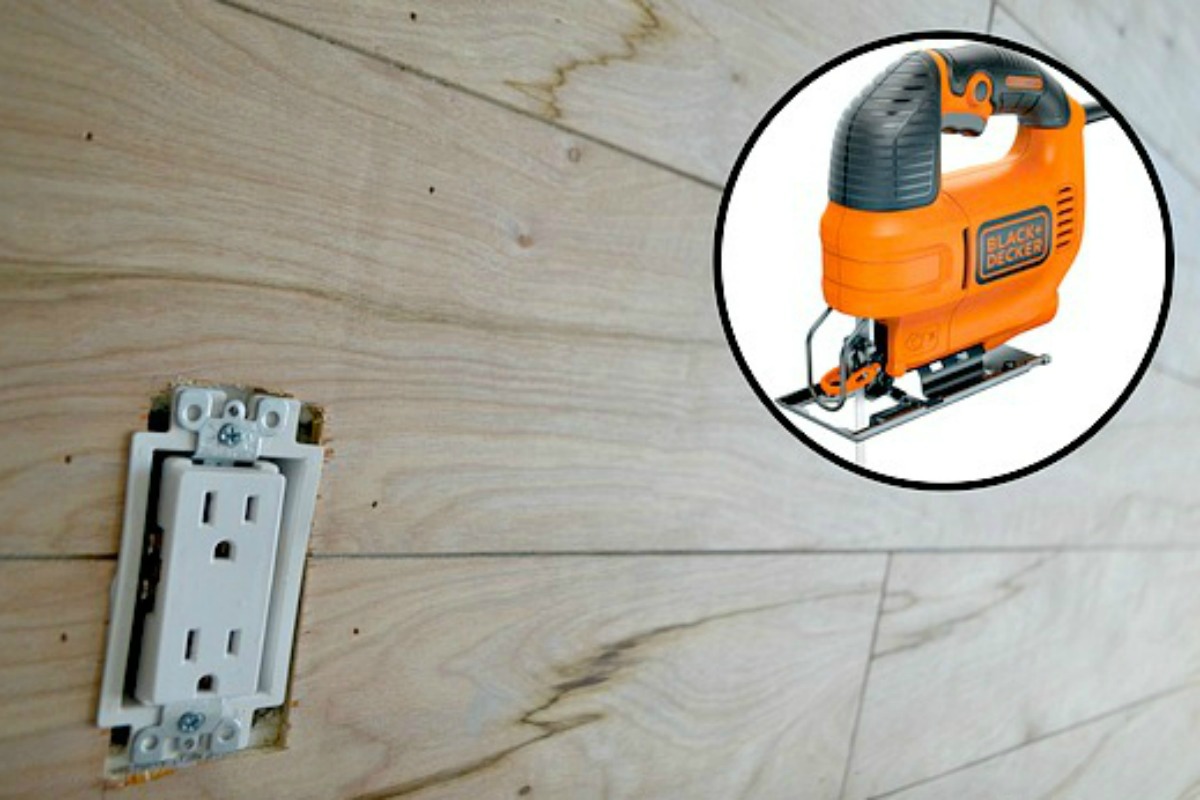
4. If your wall has an electrical outlet, use a jigsaw to cut out space for it.
Measure where your outlet would be on the wood board, and use a pencil to mark it. Make your cuts using a jigsaw. Note: You’ll have some forgiveness because of the plastic cover plate, so don’t stress trying to make it perfect.

5. Make it a family project!
My job was to sand any rough edges on the wood. My son applied the liquid nails to each plank and handed the wood to my husband, who would then nail it to the wall. Teamwork!
6. Installation is actually a lot less difficult than you’d think, too.
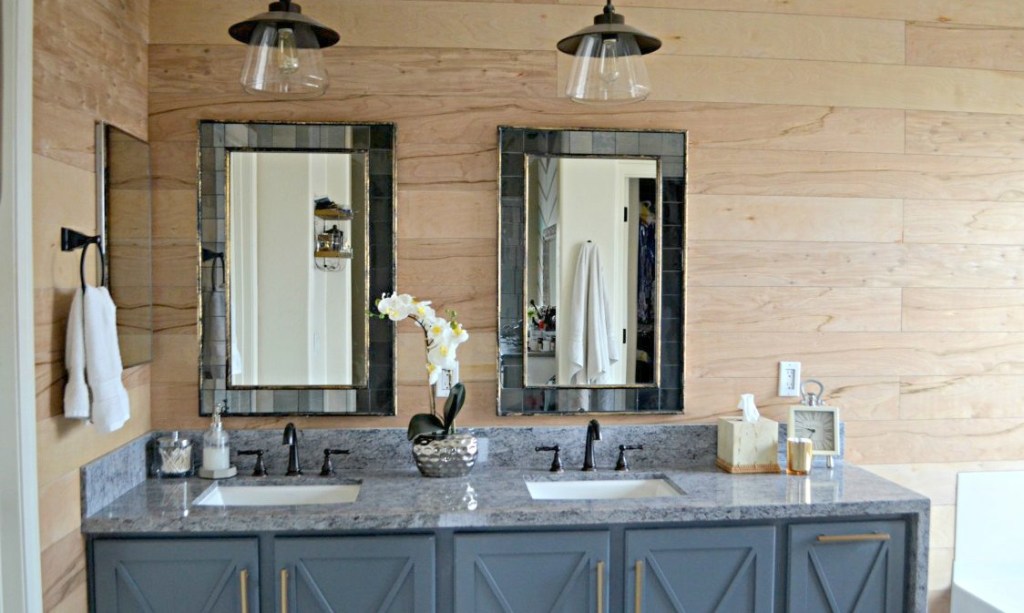
If you enjoy home improvement projects as we do, then this would be an excellent weekend DIY to consider! Above is a photo of our bathroom after we added the wood faux shiplap strips – before painting. I haven’t gotten to that paint step yet, and we may even leave it natural or stain it. Below is a photo of our family room wall after we painted the plywood planks white.
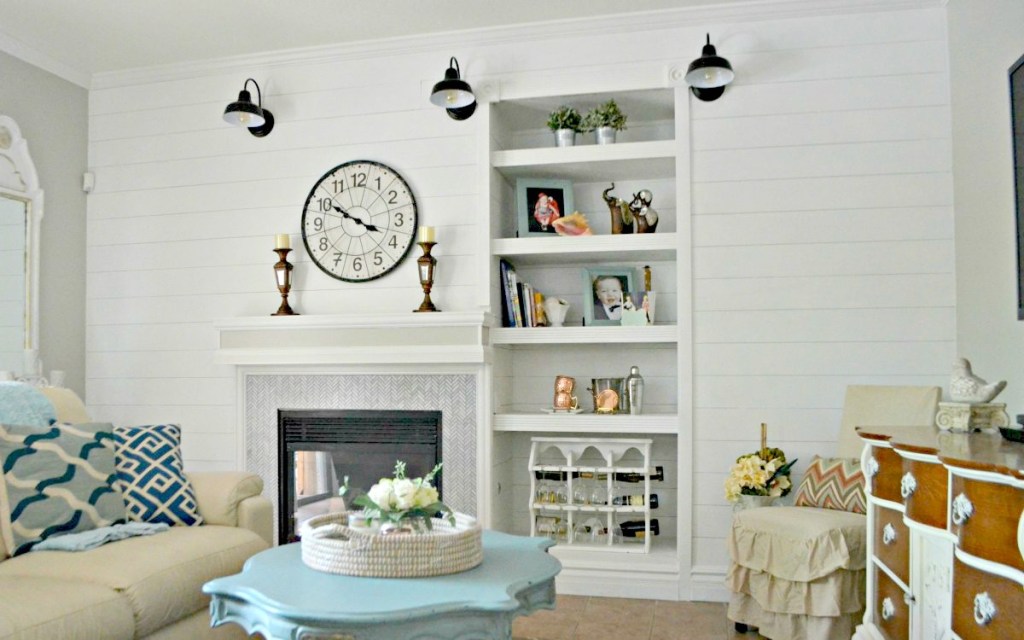
As you can see, this project doesn’t even LOOK faux, but I saved SO much money! Try it for yourself and see!


Im sorry but i live in a house with 70s wood paneling and i cant help thinking this is paneling just turned horizontal.
Thanks for taking a moment to comment, Angela! I can see that comparison. We did have paneling in one room of a house we lived in when I was little. It was VERY dark wood. I’m loving this shiplap as it is much brighter and the wood panels appear much wider. It feels more refreshing. Hope that helps!